
How to Build a Giant Spider DIY Halloween Prop Using Wire and Spray Foam

 Halloween Decor
How to Build a Giant Spider DIY Halloween Prop Using Wire and Spray Foam
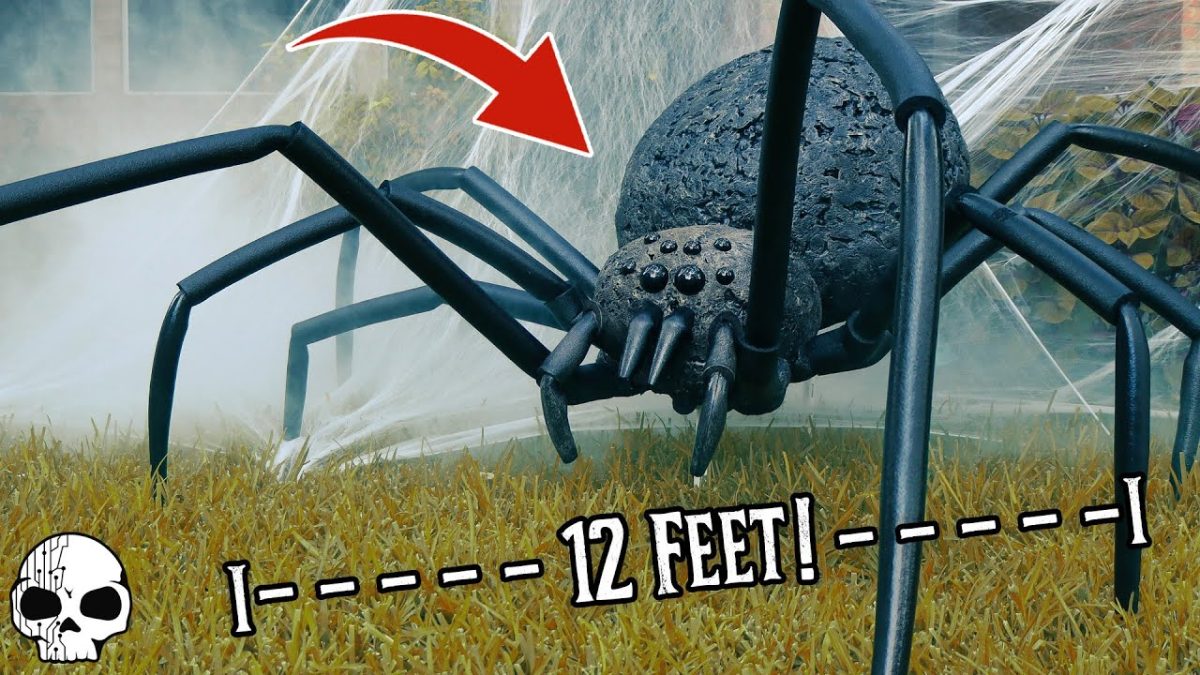
Building an imposing, life-sized giant spider DIY Halloween prop requires nothing more exotic than standard hardware store supplies like chicken wire, pipe insulation, and expanding spray foam. By shaping a hollow wire armature and cladding it in textured foam, home haunters can produce a weather-resistant, oversized arachnid that rivals commercial display pieces at a fraction of retail costs.
Transforming lightweight materials into rigid, organic-looking creature features relies on simple structural physics. Chicken wire provides tensile rigidity while remaining easy to manipulate by hand, creating the bulbous abdomen and cephalothorax needed to make an arachnid silhouette instantly recognizable from the curb.
The Anatomy of an Outdoor Foam-and-Wire Prop
Outdoor Halloween props face constant exposure to wind, moisture, and temperature fluctuations. Solid wood or plaster assemblies quickly become excessively heavy and vulnerable to cracking, whereas thin plastic inflatables tear easily and lack anatomical realism.
Constructing a giant spider DIY prop with a wire armature solves both issues. The underlying structure remains mostly hollow and featherlight, yet expands into a rigid, monolithic sculpture once the foam sets and hardens.
A lightweight internal framework wrapped in protective masonry coatings provides structural durability against autumn weather without adding excess weight.
Core Materials and Workshop Tools
Gathering the correct components beforehand ensures seamless assembly during the foaming and carving phases:
- Chicken wire and 3mm structural wire for bending frames
- Plastic wrap and blue painters tape to create a backing membrane
- Expanding spray foam for mass and texturing
- Pipe insulation foam in graduated diameters for segmented legs
- Drylok masonry sealer to provide weatherproofing and stone-like texture
- Clear plastic craft ornaments for realistic, multi-lens spider eyes
- Adhesives including contact cement, Gorilla Glue, and heavy-duty duct tape
- Finishing agents such as black spray paint and acrylic craft paints
- Shaping tools: a Surform rasp tool, utility knife, wire snips, hacksaw, and chip brushes
Step-by-Step Construction Guide

Building an imposing yard monster follows an additive process: establishing structural frames, building volume, shaping surface contours, and sealing the skin against autumn rain.
- Sculpt the Cephalothorax and Abdomen: Cut and bend sheets of chicken wire into two distinct ovals—a smaller front head section and a large, heavy egg-shaped abdomen. Fasten the overlapping wire edges securely using pliers and short lengths of twisted tie wire.
- Wrap the Core: Cover the entire wire armature tightly in plastic wrap and duct tape. This plastic skin serves as an impermeable barrier, preventing liquid spray foam from falling through the wire mesh into the hollow interior.
- Apply the Expanding Foam: Coat the wrapped shapes in overlapping beads of expanding spray foam. Allow the chemical reaction to fully cure until the outer shell feels hard and firm to the touch.
- Assemble Articulated Legs: Cut graduated sizes of foam pipe insulation to mimic natural arachnid leg tapering. Thread thick 3mm bendable wire through the center of the foam tubes, allowing you to bend aggressive, creeping joint angles that hold their shape.
- Carve and Refine: Use a Surform tool and hobby blades to shave down foam bulges, carving menacing anatomical segments, mandible contours, and joint sockets.
- Install Eyes and Weatherproof: Fasten clusters of clear plastic ornament halves onto the head with strong adhesive. Coat the entire assembly with tinted masonry sealer before finishing with layered coats of black spray paint and dry-brushed acrylic highlights.
Commercial Props vs. Handcrafted Wire-and-Foam Builds
Yard display builders often debate whether buying mass-produced retail decorations outperforms building custom installations from scratch. The differences come down to durability, scale, and individual creative control.
| Factor | DIY Foam & Wire Build |
|---|---|
| Structural Weight | Ultra-lightweight hollow core; easy to carry and mount |
| Customization | Fully adjustable leg poses, dimensions, and realistic eye placement |
| Weather Resistance | High resilience when sealed with elastomeric masonry coatings |
| Storage Profile | Detachable leg segments allow compact post-season storage |
Busting Common Outdoor Prop Misconceptions

A widespread myth among rookie prop builders is that expanding spray foam is naturally waterproof right out of the can. While cured polyurethane foam resists casual moisture, uncured cellular pockets and shaved surfaces readily absorb water like a sponge if left unsealed outdoors.
Exposing raw, carved foam directly to heavy October rains leads to waterlogging, structural sagging, and interior mildew. Applying a dense masonry waterproofer such as Drylok acts as both a protective weatherproof shield and an ideal primer, creating a gritty surface that holds acrylic and spray paint permanently.
💡 Plan your mounting strategy early so you know where to run hidden attachment wires before sealing the body.
🔍 Vary your leg segment lengths to give the spider an asymmetrical, predatory stance across your lawn or roofline.
📌 Test your outdoor paints on scrap foam to confirm your spray solvents will not melt uncured chemical surfaces.
👇 Share your experiences with us and let fellow haunters know your favorite prop-building tricks in the comments below!