
How to Build a Glowing DIY Bubbling Halloween Cauldron With Clear Ornaments and LED Lights

 Halloween Decor
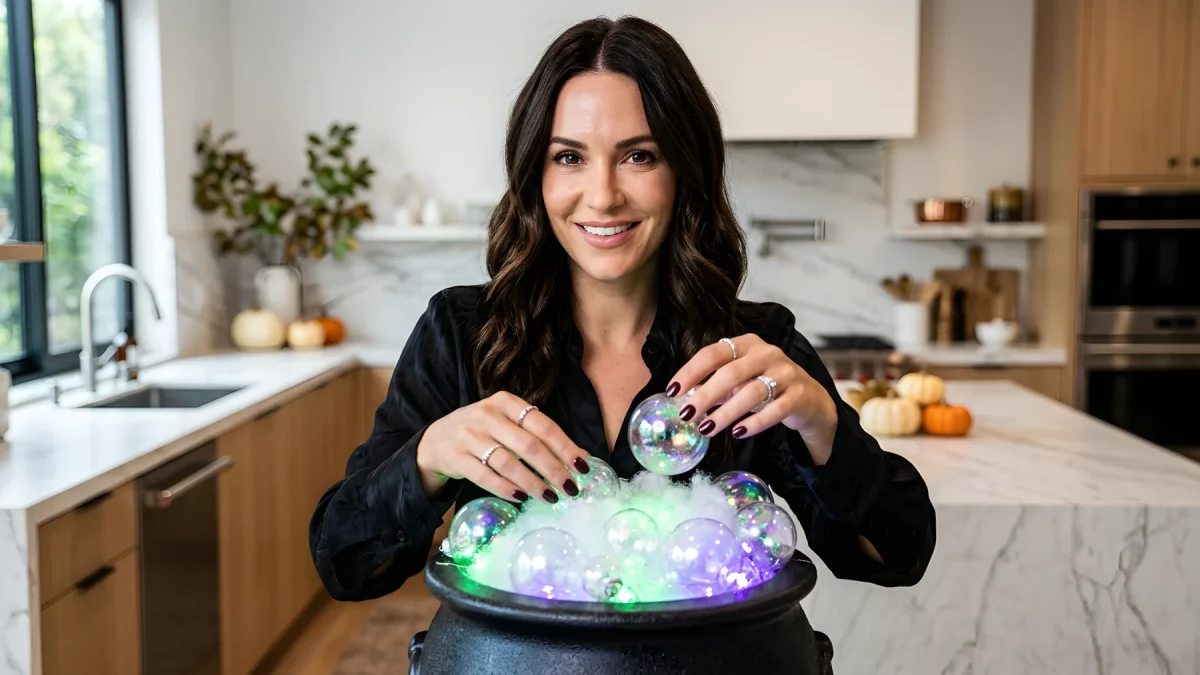
A cluster of clear iridescent spheres combined with internal LED illumination creates the realistic illusion of a boiling magical brew.
Creating a glowing bubbling Halloween cauldron requires just three primary components: a lightweight plastic kettle, multi-sized clear shatterproof ornaments, and cool-running LED string lights. By layering varying sphere diameters over an internal lighting core, makers produce an optical illusion of boiling liquid without liquids, dry ice, or expensive fog machines. This lightweight centerpiece works equally well indoors or on covered porches, eliminating the mess of fluid-based props while lasting for multiple seasons.
Achieving a convincing bubbling effect hinges on light dispersion and structural layering. Rather than filling an entire oversized pot with hundreds of plastic balls, the interior requires a lightweight false bottom that elevates the illumination directly beneath the opening. This foundation drastically cuts down on the supplies needed while magnifying the light output through each sphere.
Essential Supplies for the Bubbling Brew Effect
Before assembling the build, gathering materials with the correct heat resistance and optical clarity is vital. Standard glass ornaments pose a significant breakage risk, making plastic shatterproof alternatives the industry standard for holiday crafting.
- Plastic witch’s cauldron: A standard injection-molded plastic kettle, typically available in diameters ranging from 8 to 16 inches.
- Clear or iridescent shatterproof ornaments: A multi-pack featuring mixed sizes (such as 30mm, 50mm, and 80mm) to simulate natural froth and rising surface bubbles.
- LED light strand: Battery-operated or plug-in fairy lights in toxic green, deep purple, or amber orange with insulated copper wiring.
- Internal riser material: Floral foam, scrap cardboard, or hollow pool noodle rings cut to size.
- Poly-fil stuffing: A handful of polyester fiberfill batting to diffuse harsh pinpoint light points.
- Low-temperature hot glue gun: Glue sticks formulated for multi-surface bonding without warping thin plastics.
A common mistake in decorative lighting builds is packing light strands too tightly at the bottom, which traps illumination beneath solid filler rather than refracting through the surface spheres.
Choosing the correct adhesive temperature protects both the project and the builder. High-temperature glue guns can instantly warp or melt thin-walled acrylic globes, leaving cloudy spots on otherwise pristine plastic surfaces.
Step-by-Step Cauldron Assembly Guide
Constructing the display takes less than an hour when working systematically from the interior lighting outward to the foaming rim. Precise placement of each sphere dictates how realistic the resulting liquid surge appears under low lighting conditions.
- Construct the interior shelf: Fit cardboard disks or cut foam blocks tightly inside the cauldron until they sit roughly two inches below the rim. This false floor prevents heavy ornaments from sinking into the cavity.
- Seat the battery housing: If using a battery pack, adhere it to the top of the false floor near the back edge for easy access, or feed a low-voltage power cord through a discreet notch cut in the upper rim.
- Weave the light distribution: Distribute the LED strand across the platform, loosely interweaving the wire with small tufts of polyester batting to act as an internal light baffle.
- Anchor the base layer: Remove the metal caps and hanging loops from the largest clear ornaments. Hot glue this foundational layer directly around the inner rim and across the lighted platform, pointing the open ornament necks inward to conceal them.
- Build the frothing dome: Cluster medium and small ornaments on top of the base layer using small dabs of low-temperature glue. Extend several smaller spheres cascading over the outer edge of the cauldron lip to mimic an overflowing boil.
The resulting dome should feature tight grouping at the center with a loose, organic cascade trailing downward. Once the initial structure holds, testing the light projection reveals any dark voids that require an extra miniature sphere.
Optimizing Light Dispersion and Color
Standard clear ornaments produce a crisp, modern aesthetic, but iridescent or lightly misted globes mimic the natural surface tension of thick liquid. Dusting clear spheres with a subtle layer of frosted glass spray paint creates a cloudy, translucent finish that scatters the LED beam evenly throughout the dome.
| Orbital Material | Visual Effect and Light Spread |
|---|---|
| Crystal Clear Smooth Plastic | High-contrast, sharp refractive glints mimicking boiling water |
| Iridescent Finish | Multi-spectrum shimmer that changes hue based on viewing angle |
| Frosted or Matte Clear | Soft, ethereal internal glow with fully concealed LED wire strands |
| Green or Tinted Translucent | Deep monochromatic color saturation without changing bulbs |
Matching the bulb intensity to the globe surface ensures your prop stands out even in ambient room lighting. However, selecting the wrong light technology can quickly compromise the entire structure.
Addressing Common Heat and Power Misconceptions
A widespread assumption among first-time builders is that standard miniature incandescent holiday lights will work interchangeably with light-emitting diodes. In reality, incandescent bulbs generate concentrated thermal energy that easily softens low-temperature hot glue and degrades thin plastic spheres trapped inside a closed container.
Solid-state LED technology generates negligible radiant heat, making it the only safe choice for enclosed craft installations. LEDs also consume a fraction of the wattage, allowing multi-day battery operation on front porches where running extension cords poses a trip hazard.
Safety evaluations for decorative indoor lighting consistently highlight that combining high-wattage heat-generating bulbs with synthetic plastics inside an unventilated vessel significantly raises melting risks.
For outdoor placement exposed to rain or damp autumn air, select lighting strings bearing proper weather-resistance ratings rather than indoor-only dry-location sets. Keeping the power junction sheltered inside the base of the kettle prevents moisture infiltration during evening porch displays.
Refining the Final Display

💡 Elevate your build by running a compact, silent micro-mister or water diffuser directly behind the plastic spheres to send faint trails of ambient vapor drifting across the glowing bubbles.
🔍 Inspect your glue seams in a dark room before final placement to spot any light-blocking adhesive chunks that need a quick trim.
👇 Have you customized your own seasonal lighting props this year?
📌 Share your favorite design tweaks and lighting combinations in the comments below!